There are some things about my computer that I can put up with and then there are things that will drive me absolutely batshit insane. A noisy computer is one of them.
When I set out to build a silent mini-ITX PC, I went for passive cooling for the CPU. The case came with a power supply but I did not expect such an annoying noise to emanate from it! It was so noisy I could hear the noise from down the hallway! (It measured out to be 47dBA using a Sound Meter app)
I knew it was the PSU fan because there was only one other fan in the whole system, and when I unplugged that fan the PC was still just as loud. So, I set forth on a mission to find a replacement PSU fan.
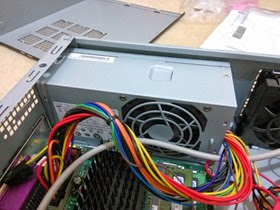
You... don't look at me like that. You've had your chance, get outta here ya flaming mongrel!
Consider alternative options
This process isn't for everyone. Some people don't like the "uneasy" feeling with modding such an important part of the computer.
For those people, it may be easier to just opt for a Pico PSU or fanless PSU which is inherently silent.
Size matters
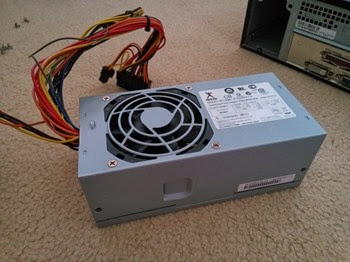
You can't always go out and buy replacement parts as some fans will be custom made to fit the PSU. You should open up your PSU to find out the dimensions of the fan first.
WARNING: This is dangerous!!!
Electricity can and has killed people, so be careful. Unplug the power cable from the PSU and then discharge it by holding the Power button on the case for a second or two. This discharges the power from the PSU so you can open it up safely. More information about safety here.
Now you can detach it from your motherboard before removing it from your case.
Oh by the way, opening up the PSU will void your warranty. Just wanted to let you know before you get too excited and bust it open.
Most power supply units can be opened up with various sized Phillip head screwdrivers.
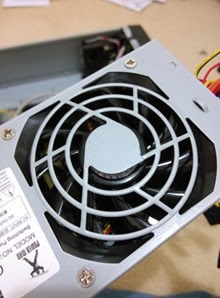
The fan will be one of the first things you'll see. There's no need to unplug it at this stage, but find a way to detach it from your PSU chassis so you can measure it properly.
Finding a suitable fan
Once you've opened up the PSU, you should now be able to look up the specs on the fan provided. In my case, it's an "ADDA AD0812MS-D70". You'll need to look up information such as the size (which you can measure), voltage and current (V & A are visible on the label), bearing type, air flow (usually CFM) and lastly noise.
Air flow: Most importantly is the amount of air it can push. The fan you're buying should provide at least the same amount of airflow as your current fan. Otherwise, your PSU is at risk of overheating and burning out.
Size: It also goes without saying that you should also find one that's the same size. The one I needed was 80x80x15mm, which is considered a "slim" case fan.
Noise: Because you're swapping it out to reduce noise, make sure you find one that has a quieter noise rating. This is a tricky one because you're after one in a particular size.
Bearing type: The type of bearing depends on how the fan sits while spinning. Ball bearing is fine because it can sit in any position and not wear out the wrong way. Sleeve bearings are a bit more finicky. If used in a horizontal position, it'll wear out very quickly. For more information, read this.
Power: The voltage and current should match as closely as possible (you shouldn't have much problems here). The one thing that doesn't matter as much is the number of pins for the power.
Some people prefer to splice some wires and make the connectors themselves, but I didn't have the tools with me on the day or the time that weekend so I had to make do.
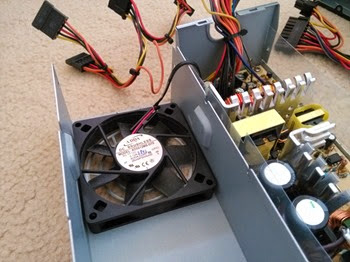
The ADDA fan used 2 pins, connected directly from within the PSU as shown in the pictures below (see "Removing the fan"). The Cooler Master R4-SPS-20AK-GP I purchased has 3 pins, so I simply ran the fan's power lead outside of the case and connected it outside of the PSU to a molex connector.
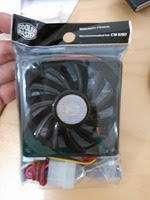
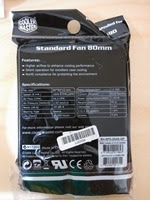
Case fan to molex adapter. I got one of these with my Cooler Master fan.
Removing the fan
The TFX power supply I was modding had some glue on the fan plug, making it hard to remove. I used a stanley knife to slowly cut the glue away without damaging the capacitors.
BE PATIENT! Damaging the electronics just means you've wasted your time and have to buy a new PSU.
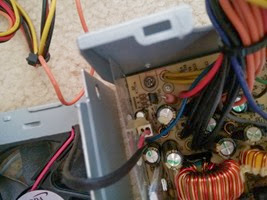
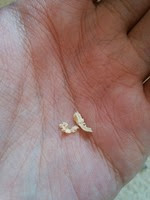
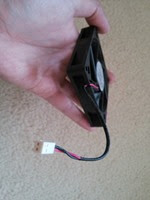
Slowly cut the glue off without damaging the capacitors.
Installing the new fan
Make a note of how the original fan operates, then take a look to the side of your new fan to see how it should be situated. There are arrows to indicate the airflow and which way it should be situated.
In the picture below, the air flow towards me, with a bias towards the right. The "right" bias should be towards the vent where the hot air should come out of.
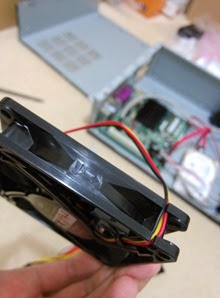
The new tenant has just moved in.
Replace all the pieces of the case, making sure you don't miss anything.
Test it!
Before putting the PC case back on, make sure the PSU fan is spinning after you press the power button. Test with your hand to see if air is coming out from the vents as expected and coming in where expected.
If all is well, seal the case back on and power it up. The new noise rating measured up to be 30dBA and I can barely tell that it's on!

So happy with the fan mod I can barely contain myself!


![tumblr_m26nvnNG5o1qkk10ro1_500[1] tumblr_m26nvnNG5o1qkk10ro1_500[1]](http://lh6.ggpht.com/-QNkPD_yLE_E/UzQdaTiYCEI/AAAAAAAAD5w/VGyTMqWyEpk/tumblr_m26nvnNG5o1qkk10ro1_500%25255B1%25255D%25255B4%25255D.jpg?imgmax=800)
