The other day I was glancing at Task Manager and noticed something annoying...
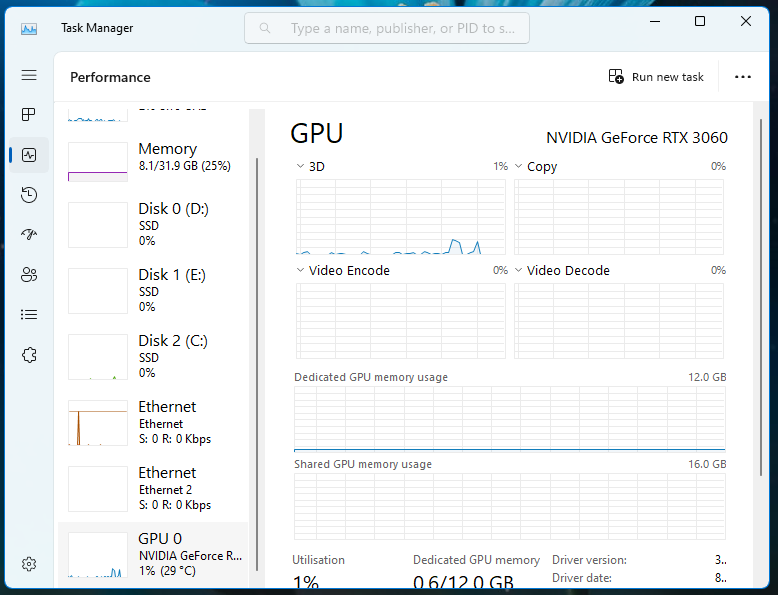
For some odd reason, the GPU was busy at around 40% capacity while I wasn't really doing much on the desktop.
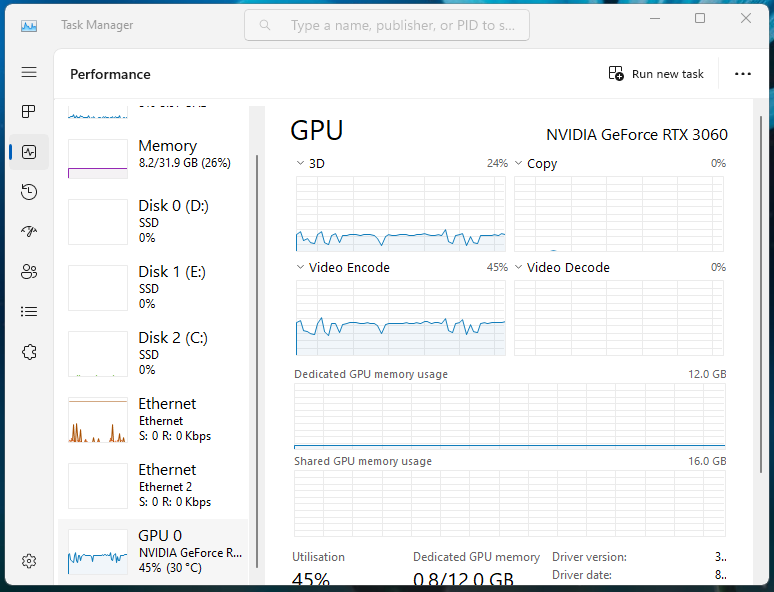
After a bit of sleuthing, it turns out the "Instant replay" feature is constantly recording and encoding in the background, which is a pretty cool feature for gaming but a waste of power for my day to day usage.
While the easy option is to turn off Instant Replay altogether, I still want it on while I play games.
Fortunately there is an easy way to achieve that, but unfortunately its not obvious how.
1. Turn off Instant Replay (and watch your GPU usage drop to 0%)
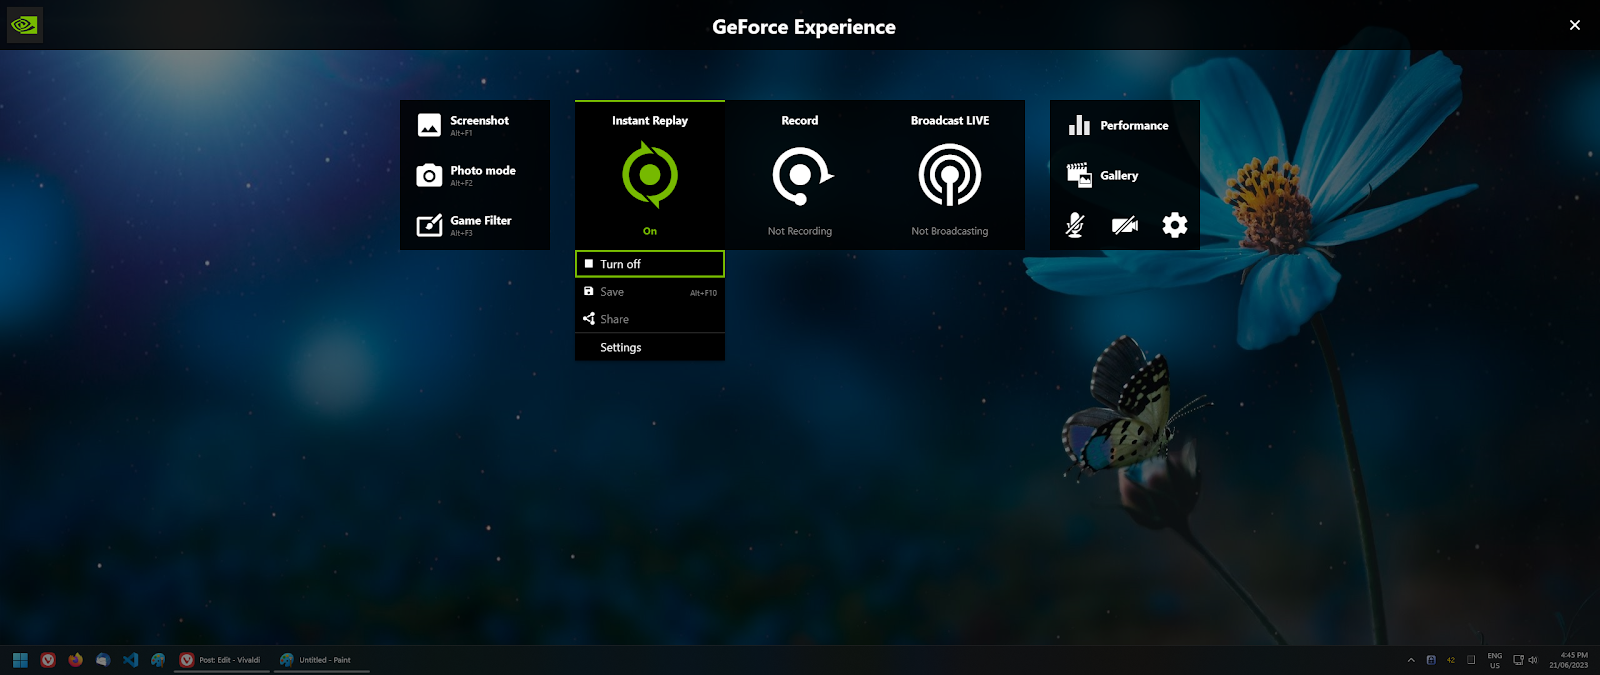

2. Turn off desktop recording by going to
- Settings (Cog)
- Scroll down to Privacy control
- Untick "Desktop Capture"


3. Back out and "Done" until you see the main UI
4. Turn Instant Replay back on and enjoy the 0% usage while idling on desktop