Showing posts with label virtualbox. Show all posts

VirtualBox: Cloning a physical drive (HDD or SSD) to VDI on Windows

Open up Partition Manager on Windows to find your "disk number"


Open up a Command Prompt and type:

VBoxManage.exe convertfromraw \\.\PhysicalDrive2 C:\output.vdi --format VDI

Replacing "2" with the drive index you want to clone and changing the output location to whereever you want.

That should be it!

Update:

VBoxManage creates a full clone, meaning the image will take up as much space as the physical drive. If you want an image based on just the content, use Disk2vhd from Microsoft

Sources

How to Resize a VirtualBox partition (example with Ubuntu LVM2 PV)

Initially when I created the VM I thought would be temporary. It turned out to be not so temporary.

I thought I could just get away with using GParted and resizing the blocks around, but it turned out to be more tricky than expected.

Preparation

BEFORE YOU DO ANYTHING,

MAKE A BACKUP OF YOUR VIRTUAL DRIVE!

  • Make sure the VM is off
  • Find the VDI file for the drive
  • Make a copy of it


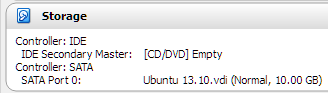
image

For example sake, here's my 10gb guinea pig.

Expanding the size of the drive

In your host, you have to run some commands to increase the capacity of the drive before you can do anything with partitions.

Use a calculator to calculate how much space you want to allocate in MB.

For reference, 100GB = 1024mb * 100 = 102,400mb

In command prompt, run these commands:

  • cd %PROGRAMFILES%\VirtualBox\
  • VBoxmanage modifyhd "path\to\your.vdi" --resize 51,200

This will only increase the capacity of the file itself.

You can check it in the VirtualBox VM details page, but it's not actually accessible yet.

You still have more work to do.

image

Lo and behold, I am now 50. Oh wait I'm not, I just look it.

Create a new VM which uses LiveCD

I used a copy of LinuxMint and configured it for Live CD usage. This was purely because I already had the ISO on hand. If you don't, you can save yourself the wait and just grab a GParted LiveCD from their website.

  • CD/DVD drive: LinuxMint or GParted ISO file
  • HDD: Select the VDI drive you want to resize

Using GParted

  • Once you're in GParted and can see the HDD, you'll notice there's a whole lot of free space now
  • If it's locked (there's an icon of a vault), right click and select "Deactivate"
  • Resize the partition (you may need to do this in multiple steps in order to get the right structure)
  • Apply changes
  • Shut down GParted VM

image

Remember to test the "resized" partition before continuing!

  • Load up your normal VM
  • Test that it boots and operates as normal
  • Check the amount of space remaining with df -kh

image

Extra steps for LVM partitions

If you're not seeing the space show up in df results, to make that space accessible to the partition you'll need to run two more commands.

The MOUNTPOINT for my VM was "/dev/mapper/ubuntu--vg-root"

  • sudo lvextend -l +100%FREE MOUNTPOINT
  • sudo resize2fs MOUNTPOINT

First command expands the LVM while the second resizes the filesystem.

coxGG

Now, are you sure that you don't have too much space?

Sources

Windows 10 Technical Preview & Virtualbox: Your PC needs a restart. Error Code: 0x0000000A

At time of writing, I tested this with the latest version of Virtualbox v4.3.22 and Windows 10 Technical Preview Build 9926.

Correct steps to failure

  • Set up the 32-bit virtual machine

image

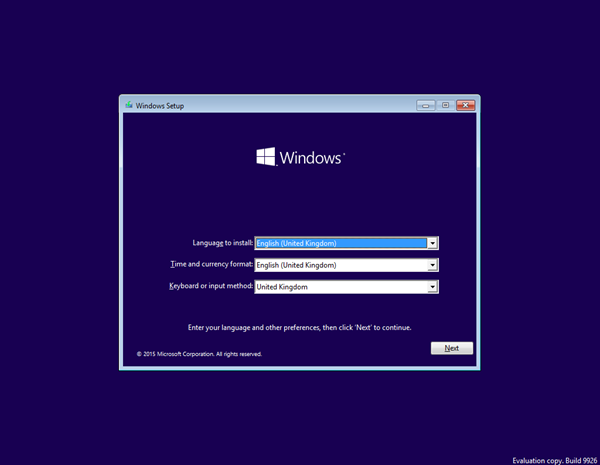
  • Select the 32-bit technical preview ISO.

image

  • Start it up and watch it burn.

image

  • BOOM!

Your PC needs a restart.

Please hold down the power button.

Error Code: 0x0000000A

Parameters:

0xFFD00000

0x000000FF

0x00000003

0x8158B5E3

The fix for it

This baffled me for some time because I thought VirtualBox was buggy or something. Oddly enough, telling Virtualbox to expect a 64-bit operating system will fix it.

image

image

I'm not sure if this is a bug within Windows 10 (because it worked fine in previous technical preview releases) or a bug with VirtualBox. Either way, hope it gets fixed before Windows 10 gets released!


Source

Installing Windows 10 Tech Preview on Virtual Box

Downloads

First of all, you'll need the Windows 10 Tech Preview ISO. You can get it from Microsoft's download page. I grabbed English 64-bit (x64), which was "WindowsTechnicalPreview-x64-EN-US.iso"

Setting up the VM

Back over in Virtualbox-land, as per usual you just create a new virtual machine for Windows 8.1 and matching the build you've got (x86 or x64). I'll assume you got the x64 build. Everything is per usual, create a new hard-drive, etc.

Once you're done, go to "System" settings for that VM. Despite what another guide has wrongfully stated, make sure that "Enable EFI (special OSes only)" is OFF and under the Processor tab that "Enable PAE/NX" is OFF as well. If these are left on, you won't be able to enter the installation process.

Lastly, go to "Storage" and select the CD icon from "Storage tree". Click on the CD icon on the right and select "Choose a virtual disk file", then select your Windows 10 ISO file.

Installation

Nothing out of the ordinary here. Takes about half an hour on a regular non-ssd HDD.

It installs smoothly just like Windows 8.1 and even has the same wizard process during the first boot.

1 2 

Yay, store apps. Exactly what I didn't want.

3 
That bloody "Almost ready" was there for a frikken long time!

5

Unfortunately, there isn't any visible way of getting rid of that list of apps from the start menu.
I'll find a way by reworking my BreadCrumbKiller or SPASM programs.

To get rid of the live tiles from your Start menu, see here.

VirtualBox Guest additions

Majority of it works, but if you wanted the whole she-bang you can extract the drivers and manually install the video drivers.

  • Go to Devices > "Insert Guest Additions CD image"
  • Then open up command prompt in your VM.
  • Type:

cd /d D:

# If x64

VBoxWindowsAdditions-amd64 /extract /D=C:\Drivers

# If x86

VBoxWindowsAdditions-x86 /extract /D=C:\Drivers

  • Wait for it to finish.

image

  • Open up Device Manager and find the "VirtualBox Graphics Adapter".
  • Right click it and select "Update driver software"
  • Browse my computer for driver software
  • Click Browse
  • Select C:\Drivers\
  • Next
  • Done!

VirtualBox: Fix for "Cannot access the kernel driver"

I ran into this when trying to upgrade my VirtualBox from 4.2.6 to 4.3.6. It was a really frustrating one to fix. There are a few suggested fixes floating around such as:

  • Manually installing both VBoxUSBMon.inf and VBoxDrv.inf drivers (didn't work for me)
  • Uninstall and reinstall (wasn't possible because the uninstaller kept rolling back)
  • Removing the network interfaces manually before installing (they weren't there)
  • Install over it (installer for new version kept rolling back)
  • Removing the files from user and program file folders, then manually searching/replacing all instances of VirtualBox in the registry (this is brute forcing it and I don't want to resort to this)

None of them worked for me.

What I ended up doing was:

  • Grab an old copy of your Virtualbox installer (make sure it's the same version!) from the VirtualBox wiki
  • Run the installer
  • Select "Repair" (on the old version)
  • Reboot
  • (optional) Uninstall the old version
  • Install the new version

This time it should work!

GfZf4F6
Simple, no?

Sources

Android: Faster debugging emulator for development with Android x86

If you're doing Android dev, most likely you're working on a computer with an x86 compatible CPU.

Unfortunately the older versions of Android SDK images (including 2.3, still one of the most popular in the play store at time of writing) are optimised for ARM chips. The ARM optimised commands are run in the emulator and then translated into x86 commands. This is very slow, but you since you're reading this you already know that.

Even with the Intel chipset improvements from Icecream Sandwich onwards, the emulator still leaves much to be desired in terms of performance.

Android x86, as the name suggests, was originally made to run Android on x86 computers. A wonderful side-effect of this is that it runs incredibly fast in a virtual machine compared to the standard Android emulator.

Gk1Ew
Amazingly fast!

And getting it to work for debugging isn't that hard either.

Setup

  • Grab a copy of Android X86. There seems to be customised builds, but the EEEPC Asus ones worked fine for me.
  • Download and install VirtualBox.
  • Create a new virtual machine (VM)
  • Give it a name, select "Other" for type and "Other/Unknown" for version.
  • You can match what you want to your phone/tablet specs such as memory/space (1GB memory is nice and zippy)
  • Go to Settings
  • Click on Motherboard
  • Under Bootloader, disable Floppy. Move HDD above CD.
  • Under Storage, click on the "Empty" CD icon and then the other CD icon on the right.

image

  • Find and choose your Android x86 ISO file.
  • OK to save.
  • Fire it up and you'll come to an option screen. Select Installation.

AND1

  • Create/modify devices
  • New, Primary, press enter (to use 100% of the space)
  • Bootable, Write, type "yes" and press Enter
  • When it's done, Quit
  • Select sda1
  • Select EXT3
  • Yes to GRUB
  • Choose yes or no for allowing /system to be writable. It's really up to you and how you wish to use the VM. It doesn't take very long to install anyway.
  • Once you're done, reboot.
  • It should now show you 3 options; HDPI, MDPI and Debug. That's when you know it's working!
  • Select any of them and enjoy developing for Android at a much faster rate!

Once it's up and running, reboot it (just to see how fast it starts). No more waiting for snapshots to load!

Tweaking

Now for some stuff to help you get started with Android dev.

You'll need to connect your Eclipse Android SDK debugger to the VM, and to do that you'll need to set up port forwarding on the VM.

By default it's a fairly generous tablet sized screen. For phone development, you can change the screen orientation to portrait orientation.

Caveats

There's no way of sugar coating this. In trade for the speed and performance you get with this method of debugging, you lose the ability to rotate the screen while the VM is running.

If you've got any way around this, please let me know!

Source

Android x86: How to change the screen orientation to portrait orientation in VirtualBox

This was definitely trickier than expected! There are two things you need to do. First is to create the resolution, second is to edit the grub file.

Create the resolution

Open up command prompt and type in:

cd /d %PROGRAMFILES%\VirtualBox\
vboxmanage setextradata "Android 2.3" "CustomVideoMode1" "320x480x16"

This creates an extra resolution for your Android X86 virtual machine (replace "Android 2.3" with whatever your one is called). Of course, you can replace the resolution with whatever you want to.

Now fire up the VM. Once it loads up to the lock screen (you don't have to swipe to unlock):

  • Press Alt+F1 to enter the terminal
  • Type "su"
  • mkdir /data/fs
  • mount -t ext3 /dev/block/sda1 /data/fs
  • vi /data/fs/grub/menu.lst
  • Find the menu item you want by scanning the titles. I wanted to work on MDPI so I chose the second menu item.
  • On the line starting with "kernel", go to the end and press "i" to begin editing (yes, vi has some crazy conventions)
  • Change DPI=160 and vga=ask
  • (You can also take this chance to edit your default item to load. It's 0-based indexes)
  • Press escape to edit editing mode
  • Without the quotes, press ":wq" to save and quit (yeah, even more crazy vi conventions)

Restart your VM. When it boots, it'll give you an option to press enter to see video modes.

Take note of the "mode" next to your resolution. For me "320x480x16" was "360" (bottom left). Type in 360 and continue loading.

Android 2

This bit took me a while to figure out, but "360" is a hex value and you'll have to convert it value to a decimal first. In this case, 360 hex is 864 in decimal value.

Time to edit the file in vi again.

  • alt+f1 again to get into the console
  • mount -t ext3 /dev/block/sda1 /data/fs
  • vi /data/fs/grub/menu.lst
  • Change vga=ask to vga=864 (or whatever your decimal VGA mode is)
  • :wq to save
  • Reboot

Android 2
You should now see this wonderful phone sized emulator on your screen.

Sources

VirtualBox: Connectivity between Guest and Host

While setting up my Android x86 emulator on VirtualBox, I had some issues getting the networking right. VMWare would get this working easily, but it's quite an expensive and heavy handed piece of software if you think about it.

What I wanted was to have my Android x86 guest be able to fetch information from a server running on the host. Also, the host had to be able to connect to the guest for debugging.

After a few searches, I found that some guides only let you connect from host to guest. Others only let you connect from guest to host.

This one says you can connect between the two only if there is a router/internet connectivity. This was a bit of a deal breaker as I do a lot of my work on the train.

After a few hours of tinkering I had great success using "NAT", but only with port forwarding enabled. Two way communication between host/guest, and internet connectivity as well!

To do that:

  • Go to the VM settings
  • Network
  • Ensure that "NAT" is selected
  • Click on "Advanced"
  • Port forwarding
  • Click on the + icon on the right side
  • Name it (in this case Android Emulator), select either TCP or UDP, you can leave the IPs blank and match the ports you want to forward.
  • OK to save

image

Some screenshots of it working

host-to-guest
Host to guest for debugging and guest with internet connectivity.

guest-to-host
Guest to host connectivity.

How to connect?

You still connect from guest to host via 10.0.2.2, but to connect from host to guest you'll have to port forward the request from host to the guest. From host to guest you use "localhost" or 127.0.0.1 instead of the actual guest IP.

For example, before you'd have this command:

adb.exe connect 192.168.56.15

Now it's:

adb.exe connect localhost


l.php
Now that it's all connected, GET BUSY!

 
Copyright © Twig's Tech Tips
Theme by BloggerThemes & TopWPThemes Sponsored by iBlogtoBlog