Showing posts with label linux. Show all posts

Getting native Linux terminal on Win10 WSL (Windows Subsystem for Linux)

(Wow, it's been a while since I've written anything! Since Open Live Writer doesn't seem to be working anymore, I had to venture back into writing straight in the browser. Dammit Blogger it's still awful)

After upgrading to Win10 1809 (the infamous November 2018 rollout) and updating to the latest WSL Ubuntu build, I noticed a bunch of issues with my ConEmu/WSL setup.

Vim wasn't navigating as it should; ignoring input at random and text wasn't pasting properly into the command line. It seemed to be truncated randomly and I couldn't spot a pattern. Turns out there were some changes to the way input was encoded and I needed an update for ConEmu and use their wslbridge script.

I tried updating and the performance hit was awful. I had native WSL and bridged ConEmu side by side tailing the same log file and the bridge script was causing it to jitter uncomfortably.

Along the way I found an extremely helpful post by ropnop called "Configuring a pretty and usable terminal emulator for WSL". I didn't know it was possible to forward the X Window manager to... Windows! There was a detail or two missing (regarding firewall and dbus) but eventually I managed to get it working in a slightly simpler way (no need for vbscript).

Downloads

Setup


  • Install VcXsrv and run XLaunch. The default settings are fine, but be sure to save the config so you can simply run the configuration to start X.
  • Alternatively you can start it with:
    "C:\Program Files\VcXsrv\vcxsrv.exe" :0 -ac -terminate -lesspointer -multiwindow -clipboard -wgl -dpi auto
  • Make sure the icon appears in the taskbar.


  • Open up an instance of WSL Bash
  • Start off with "sudo apt-get update"
  • Followed by "sudo apt-get install dbus-x11 gnome-terminal" (you can substitute gnome-terminal with whatever terminal you'd prefer)
  • Confirm install and let the downloads start
  • While you're waiting, be sure to create a firewall rule to prevent anyone else from accessing your X server
  • (Firewall setup) Go to "Windows Defender Firewall" and click on "Advanced settings" on the left

(I hate the labyrinth known as Windows 10 settings)


  • Click on "Inbound Rules" under "Windows Defender Firewall ..."
  • Right click > "New Rule" (or click on New Rule on the right panel)
  • Rule type: Program
  • Program path: C:\Program Files\VcXsrv\vcxsrv.exe (by default)
  • Allow the connection
  • Only apply to Private connections
  • Then give the rule an appropriate name
  • Edit the new rule you've created
  • Go to the "Scope" tab and add 127.0.0.1 to both local and remote IP restrictions


  • Apply and finish
  • (Back to the terminal setup) Once it's done downloading, give dbus a kick start:
    sudo /etc/init.d/dbus restart
  • Test that window forwarding works by pasting this in:
    DISPLAY=:0 gnome-terminal &
  • If it works, create an alias in ".bash_aliases" called "runterminal" with the following:
    alias runterminal="DISPLAY=:0 terminator &"


  • Finally, create a shortcut on your desktop to easily start gnome-terminal:
    bash.exe -i -c "runterminal"
  • Set "Run" to minimised to avoid an unnecessary command prompt flicker.
  • And now you're done!

Sources


Samba File Server: Stop files from being set with executable bit

While doing a bit of code cleanup today, I found some files which were marked as executable even though they weren't meant to be.

image

As I looked around at the files affected, a colleague did some snooping on git and found out why it was being set.

"Err Twig, I think it's you".

After double checking the git logs, yep it was me. How embarassing!

dramatic_alpaca

Preventing the stupid setting

Fortunately it's an easy fix to stop it from happening.

Open up the Samba FS config file

  • sudo vi /etc/samba/smb.conf
  • Under "[global]", paste in:

map archive = no

  • Save and restart

Bonus: Fixing affected files

Unfortunately, this part isn't so easy

You can use this command to quickly search and list out files affected:

find -type f -perm /u+x | vim -

If you want to just find and turn off the executable bit automatically, then use:

find -type f -perm /u+x -exec chmod -x {} \;

find -type d -perm /u+x -exec chmod 0755 {} \;

It'll be up to you to set +x back onto any files which were supposed to have it.

Source

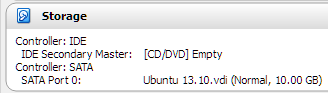
How to Resize a VirtualBox partition (example with Ubuntu LVM2 PV)

Initially when I created the VM I thought would be temporary. It turned out to be not so temporary.

I thought I could just get away with using GParted and resizing the blocks around, but it turned out to be more tricky than expected.

Preparation

BEFORE YOU DO ANYTHING,

MAKE A BACKUP OF YOUR VIRTUAL DRIVE!

  • Make sure the VM is off
  • Find the VDI file for the drive
  • Make a copy of it


image

For example sake, here's my 10gb guinea pig.

Expanding the size of the drive

In your host, you have to run some commands to increase the capacity of the drive before you can do anything with partitions.

Use a calculator to calculate how much space you want to allocate in MB.

For reference, 100GB = 1024mb * 100 = 102,400mb

In command prompt, run these commands:

  • cd %PROGRAMFILES%\VirtualBox\
  • VBoxmanage modifyhd "path\to\your.vdi" --resize 51,200

This will only increase the capacity of the file itself.

You can check it in the VirtualBox VM details page, but it's not actually accessible yet.

You still have more work to do.

image

Lo and behold, I am now 50. Oh wait I'm not, I just look it.

Create a new VM which uses LiveCD

I used a copy of LinuxMint and configured it for Live CD usage. This was purely because I already had the ISO on hand. If you don't, you can save yourself the wait and just grab a GParted LiveCD from their website.

  • CD/DVD drive: LinuxMint or GParted ISO file
  • HDD: Select the VDI drive you want to resize

Using GParted

  • Once you're in GParted and can see the HDD, you'll notice there's a whole lot of free space now
  • If it's locked (there's an icon of a vault), right click and select "Deactivate"
  • Resize the partition (you may need to do this in multiple steps in order to get the right structure)
  • Apply changes
  • Shut down GParted VM

image

Remember to test the "resized" partition before continuing!

  • Load up your normal VM
  • Test that it boots and operates as normal
  • Check the amount of space remaining with df -kh

image

Extra steps for LVM partitions

If you're not seeing the space show up in df results, to make that space accessible to the partition you'll need to run two more commands.

The MOUNTPOINT for my VM was "/dev/mapper/ubuntu--vg-root"

  • sudo lvextend -l +100%FREE MOUNTPOINT
  • sudo resize2fs MOUNTPOINT

First command expands the LVM while the second resizes the filesystem.

coxGG

Now, are you sure that you don't have too much space?

Sources

LinuxMint: Fix blank screen at startup with mouse cursor showing

When my LinuxMint desktop froze up, I thought nothing of it and hit the reset button. After booting up, I had a strange issue with it not responding after login. All it displayed was a black screen and my cursor.

A few other people had the same issue and there weren't any clear indicators to why this happened.

I pressed CTRL+ALT+F1 to get into the terminal. The following attempts didn't work.

  • A few search results told me to install gnome shell so I could get back into the login screen, which allows you to select which X server to use. Didn't work.
  • Another told me to run cinnamon-session or startx to kickstart it. Didn't work.
  • Another told me to uninstall cinnamon and reinstall it. It worked, I got back in but then on the next reboot it didn't work.

During my ventures on the session that was working, by chance I noticed something unusual. I was low on disk space. I've run out of it actually.

The fix? Surprisingly easy

I poked around the trash folder and found it was brimming with files. Over a hundred gigabytes of rubbish! After wiping it clear via the terminal, I rebooted and haven't had any issues since.

It's a damn shame Linux has to crash and burn so hard because things like this could have been avoided if I had been given a little notification regarding my remaining space when it was running low.

YtbdkPI
Crashing and burning because of a little mistake...

Sources

Pages I resorted to but weren't overly helpful to me, but maybe they'll help you.

Linux: Enable Remote Desktop support for LinuxMint/Ubuntu

Normally, SSH will get you 90% of the way. But today I needed to access the desktop side of things in order to check some settings and well, it involved a little extra work.

What you'll need to install

  • xrdp - The remote desktop server that interfaces with a bunch of different protocols (rdesktop, freerdp, and Microsoft Windows remote desktop clients)
  • vino - The remote desktop server which allows you to log into your actual current desktop session.

Installation

As with most good libraries in Linux, it's been packaged for easy installation. Open up your terminal and type in:

sudo apt-get install xrdp vino

Configuration

By default, Vino asks the current user to allow remote control over the current desktop. In my case, I don't want this confirmation because it's a headless device protected by xrdp's login screen.

You'll need to perform this from the Linux desktop.

In the terminal, bring up the vino settings dialog by typing:

vino-preferences

Select "Allow other users to view your desktop" and make sure "Allow other users to control your desktop" is selected.

You'll probably also want to customise the security settings to your liking, such as unticking "You must confirm each access to this machine".

Close to save.

image

Once it's done, you'll need to link xrdp and vino.

vi /etc/xrdp/xrdp.ini

Now add a new entry so xrdp knows how to activate vino (localhost, port 5900)

# set empty username because VNC auth
# doesn't actually use username, so no
# point in asking the user for one.
[xrdp8]
name=Active Local Login
lib=libvnc.so
username=
password=ask
ip=127.0.0.1
port=5900

Extra step for XFCE users

That should be enough get Ubuntu up and running on Gnome. However, if you're on XFCE, you'll need to manually add vino-server to the startup scripts.

Go to "Settings" > "Sessions and startup" > "Application auto start"

image image

Click "Add" and type in:

Name: vino-server

Description: RDP Client

Command: /usr/lib/vino/vino-server

You can either type in "vino-server &" in a terminal to start it or restart the session or computer.

Sources

Linux: Installing Peer Guardian 2; an IP blocker like PeerBlock for Windows

Peer Guardian 2, once called MoBlock, has taken the place of the original Peer Guardian which has been abandoned. This helps guard against nasty internet peers such as other users, honey pot type servers, ad servers or known malware hosts. Other uses can be to protect yourself against IP loggers such as copyright activists.

aeNQz7W_460sa
The internet. It's a dangerous world out there full of "WTFs"...

The installation process is now much easier than it was 2 years ago when I first posted about IP blocking, so fire up a terminal and let's get busy!

sudo add-apt-repository ppa:jre-phoenix/ppa
sudo apt-get update
sudo apt-get install pgld pglcmd pglgui gksu

Without gksu (or kdesu), you'll get errors such as this:

Could not use either kdesu(do) or gksu(do) to execute the command requested. You can set the path of the one you prefer in "Options - Settings - Sudo front-end"

Now run pglgui (either through command line or your system menu).

image

  • If the blocker is running, click "Stop"
  • Click on "Configure" tab
  • Update the lists weekly
  • Tick "bluetack/level-1"
  • Untick everything starting with "tbg/". These will render your internet useless unless you know exactly why you need it.
  • Everything else is optional and to your liking.
  • Click "Apply"
  • Switch back to the "Control" tab
  • Click "Update"
  • Once it's done, click "Reload"
  • Then click "Start" as soon as it's ready

In case you're unsure, the lists I kept are:

  • atma/atma
  • bluetack/bad-peers
  • bluetack/dshield
  • bluetack/level-1
  • bluetack/spyware

This ensures I'm blocked against the standard baddies, but at the same time still able to connect out to the big bad internet.

*update 19/12/14* Thanks to Anonymous for spotting out a typo!

Sources

Linux/Bash: Execute Variable for Quick and Dirty Command Line Shortcuts

Whilst in the process of moving my personal SVN repositories into a new home, I realised I had quite a few. Thought it'd be handy to write a short one liner to help myself out.

REPO="repository_name" ; CMD="svnadmin dump $REPO > $REPO.dump" ; eval $CMD

Replace repo each time you need to run it and you're run when you're ready!

541353_10151070649517596_613949486_n
A few days late, but happy Halloween!

Bash: Delete files listed in a text file

With so many unused py files in the project, I put together a few lines of code to get rid of them.

md5sum blank/tests.py
find -name "tests.py" -type f -exec md5sum {} + | grep 1fde9e174e80f7680d95dc905a3533a3 > empty_tests.txt

md5sum blank/models.py
find -name "models.py" -type f -exec md5sum {} + | grep 8c4eb991c6dca757bdd77f539092e29b > empty_models.txt

md5sum blank/views.py
find -name "views.py" -type f -exec md5sum {} + | grep ad656aaabae09dc285884ad38d889ef9 > empty_views.txt


# Delete any files listed in the text files
# awk splits up the md5 from the filename since md5sum output is "<hash> <filename>"
rm $(cat empty_*.txt | awk '{ print $2 }')

The first part collates a list of text files for any files with the common MD5 checksum.

In the second part:

  • cat reads in each empty_*.txt file
  • awk grabs the filename component of the checksum output
  • rm removes each filename returned by cat/awk

Sources

Linux: How to scroll back up in GNU screen

Screen is a handy little thing that lets you run an extra persistent console in the background which stays active after you disconnect.

However, scrolling back up the screen buffer is a tad more tricky.

After using it on and off for a few years, I've finally run into the need to scroll up to see what's in the buffer.

To do that:

  • Press Ctrl+A
  • then [
  • And use J or K to move up and down (or the arrow keys)

41bde299_abc5_36ea
Enjoy!

Source

Linux: Script to backup files/folders and copy it onto another server

There's no need to glorify how a backup can save the day. If you've been hit by a critical hard drive error, you'll know what I mean.

pgIyE
They don't have a clue how it feels to be hit by a hdd error...

So without further adieu, let's begin.

Setting up automatic access:

Your source machine will need to be able to access the destination machine without requiring a password. Why? It's better than leaving your passwords laying around in the script files.

You'll need to generate the private/public key files and then allow access on the destination machine.

Open up a terminal window and do the following:

  • ssh-keygen -t rsa
  • Press Enter (default file is fine)
  • Press Enter (empty password is how it connects without needing one)
  • Press Enter (confirm empty password)
  • cat ~/.ssh/id_rsa.pub (to display the public key)
  • Copy it to your clipboard

Now to do some preparation on your destination server.

  • Log into your remote server
  • vi .ssh/authorized_keys (to edit your access list)
  • Paste the key from your clipboard into a new line at the bottom of the file
  • Save and exit

Now try "ssh remoteuser@server.com". It should be able to connect without asking for a password.

Preparing the backup script

You'll need a place to store the backups without cluttering up your home folder.

From this point forward, I will be assuming the following:

  • I'll be storing the backup archives in
    ~/backups/
  • The folder I want to back up
    /code/

A little explanation about what's about to happen.

We'll create a script called "backup.sh" which will:

  • compress the contents of /code/ into a TGZ file
  • The TGZ filename will depend on the current date (so you can have multiple archives)
  • When it's done, we use scp to copy the archive over to the remote server.
  • After it's been uploaded, we delete the file from our source machine.
  • Just to do a bit of maintenance cleaning, we'll delete all the old archives on the remote machine apart from the newest 3.

Now to make the script that'll do the magic.

  • "vi backup.sh" to create the script file and open it up. Paste in:
FILE="/home/user/backups/backup_code_`date +%Y.%m.%d`.tgz"
FOLDER="/code/"

tar czf - $FOLDER > $FILE
scp $FILE remoteuser@server.com:~/backups/code/
rm $FILE
ssh remoteuser@server.com '~/bin/clean_backups.sh'
  • "chmod +x backup.sh" to make it executable.
  • Use "cron" to schedule the script. Edit /etc/crontab to schedule the file under YOUR username (default is "root" user). Google the syntax for usage.

Keeping a certain number of backups

"clean_backups.sh" is a script on the remote machine which automatically deletes every backup file apart from the latest 3.

This step is optional, so it's up to you if you want to do it.

On the remote server, create a script in "~/bin/clean_backups.sh" and make it executable.

Paste in:

cd ~/backups/
ls -t backup_code* | sed -e '1,3d' | xargs -d '\n' rm

For testing purposes, replace "rm" at the end with "echo". It'll print out all the files it wants to delete.

Now, if a critical hard drive failure decides to show up in your face... you're ready!

pniyp

Sources

Linux: Run a process as daemon in background from SSH

When a process supports daemon mode, you can either run it in a screen instance or init.d script.

If you had to kill off a rogue daemon and need to start it again via SSH, you can restart the daemon with a very simple addition to the command:

For example you have /bin/daemon_process with the parameters "--daemon --log-path=~/logs/blah/"

You can execute it with:

/bin/daemon_process --daemon --log-path=~/logs/blah &

The extra & at the end makes it spit output to the current terminal, but it wont wait for the daemon to finish.

Source

Linux/Ubuntu/LinuxMint: Set up a swap file

I forgot to set up a swap partition during setup, so figured I'd use a swap file instead, in case I messed up the Mac OSX boot partition.

First, create an empty file. To know how much you need, see here. In this example, I'm using a 1GB (1024mb) swap file. Use the following command to make it:

sudo mkdir /swapfile

sudo dd if=/dev/zero of=/swapfile/1024mb.swap bs=1024 count=1048576

Now convert it into a swapfile by typing:

sudo mkswap /swapfile/1024mb.swap

Now to install it!

sudo swapon /swapfile/1024mb.swap

Check if it works. The file should now be listed after typing:

swapon -s

And lastly, automate it so it's used after ever reboot.

sudo vi /etc/fstab

Add in the following line at the end (each part is separated by tabs)

/swapfile/1024mb.swap    none    swap    sw    0    0

image
You now have more power! 

Sources:

SSH: Slow connection times when entering username and password

For some obscure reason, my SSH login was taking a long time to verify. At first I didn't realise because I've been using my Android phone the whole time, but then I tried it on a LAN connection and it still had the same issue.

The problem would go like this:

  • Connect to OpenSSH server
  • Enter in username
  • Wait approximately 3 seconds
  • Enter in password
  • Wait approximately 5 seconds
  • Login success

This is pretty darn slow, especially since I'm connected via a gigabit LAN connection and Wireless N300.

So something had to give.

Thankfully the first few results on Google did the trick.

Open up a terminal window and edit the OpenSSH config file.

sudo vi /etc/ssh/sshd_config

At the end, paste this in:

# Fix slow login times
UseDNS no

Save and exit.

Now restart your OpenSSH daemon. You can do it while connected via SSH.

sudo /etc/init.d/ssh restart

That's it! It should now connect almost immediately.

[ Source: http://unsharptech.com/2009/04/11/fix-slow-connections-to-ubuntu-ssh-servers/ ]

Wake up on LAN on Windows XP, Windows 7 and Linux

To set up the wake on LAN feature, it requires a little bit of patience and testing.

If you're looking to wake up your Linux machine, see the link in the "sources" below.

The Windows 7 sleeper

*updated 23/07/14

This one caught me off-guard. I thought this tutorial would be enough but alas, it isn't.

  • Hit up Device Manager
  • Your network adapter > Properties
  • Power Management
  • Tick "Allow the computer to turn off this device to save power" (you have to, otherwise the other two will be disabled)
  • Tick "Allow this device to wake the computer"
  • And also tick "Only allow a magic packet to wake the computer" (otherwise your computer will wake up randomly)
  • Go to the "Advanced" tab
  • Enable "Shutdown Wake-On-Lan" and "Wake on Magic Packet"
  • Disable "Wake on pattern match"
  • Click "OK" to save your settings
  • Open up "Windows Firewall with Advanced Security"
  • Click on "Inbound rules"
  • Click on "New Rule" on the top right
  • Select Port > UDP > Specific local port = 9 > Allow the connection
  • Profile will depend on your network setup
  • And name it "Wake on Lan"

That should now be enough for you to skip to the "Network and computer settings" section.

image image

image

The Windows XP sleeper

Assuming that your machine is running Windows, you'll need to set some stuff on your network interface card (NIC).

Configure NIC

  • Open up the settings dialog for your network card
  • Click on "Advanced"
  • Scroll down to "Wake from shutdown"
  • Set it to "On"
  • Click the next one, "Wake-up Capabilities"
  • Set it to "Magic packet & Pattern match"
  • Go to "Power Management" tab
  • Make sure "Allow this device to bring the computer out of standby" is UNTICKED (I know it sounds weird, but you will get random startups after shutdown if it is ticked)
  • Click OK to save

image imageimage 

Network and computer settings

Mac Address

Open up command prompt

  • Type in "ipconfig /all"
  • Look for your NIC (it should resemble something like "Ethernet adapter Local Area Connection")
  • Write down the MAC address (labelled "Physical address")

Motherboard config

Now you'll need to set up your BIOS, so this will vary depending on your motherboard.

The following instructions are for the Asus P5K-E WiFi motherboard which I use. I take no responsibility if you mess up settings on your motherboard if it is not the same.

Enable Boot ROM

  • Advanced
  • Onboard Devices Configuration
  • Set "Marvell GigaBit LAN" to "Enabled"
  • Set "LAN Boot ROM" to "Enabled"
Configure Automated Power Management Settings
  • Power
  • APM Configuration
  • Set "Power On By PCI Devices" to "Enabled"
  • Set "Power On By PCIE Devices" to "Enabled"

Save and exit, then shutdown after the next boot completes. While you wait, begin setting up the next part.

*Issue 10/7/2011*

I can't seem to figure this one out, but my machine restarts itself after a shutdown about 80% of the time.

Usually it happens after I've had the machine on for a few hours and shutdown. It boots up again, but if I shutdown the second time it stays off. Very, very annoying.

If anyone knows how to fix this, let me know!

*Update 20/7/2011*

So I'm getting sick of the automatic restarts after shutdown due to wake on LAN.

Managed to find a long thread with plenty of potential fixes. The major offenders are:

  • "Magic packet and matching pattern" selected - change it to "Magic packet" only. This did the trick for me!
  • Mouse/keyboard or even another wireless card with power management options, which should have "Allow this device to bring the computer out of standby" unticked.
  • Other devices to check can be found by running the command prompt and typing "powercfg /DEVICEQUERY wake_armed" followed by "powercfg /DEVICEQUERY wake_programmable"
  • Scheduled tasks able to wake the computer up.

Someone had faulty hardware such as power supply units with bulging capacitors while another had a faulty graphics card which triggered the reboots.

A fairly odd one was that a fridge was jumpstarting the PC due to dodgy electrical circuits in the house.

The Linux "alarm clock" machine

I'm using my "always on" Linux box to wake up the Windows machine.

Install wakeonlan using "sudo apt-get install wakeonlan"

Now when you're ready to wake up the windows machine, type in "wakeonlan -i 192.168.1.255 mac_address"

The "192.168.1" bit will depend on your network. Just keep the 255 bit because that is to broadcast the MAC address to the whole subnet.

punishingbouquetp1
BAM! Wake up!

*Updates 29/6/2011*

  • Disable allow device to power up computer
  • Broadcast IP

Testing your setup

*added 23/7/2014

I wish I knew this earlier, but it's always nice to be able to test your config. It saves you a LOT of time rebooting!

Download the "Wake-on-LAN packet sniffer v1.1 (freeware)" and run it. Attempt to send a test packet from your phone using an app (I used "Wake on Lan" by mafro for Android). If nothing comes through, check your firewall or network settings.

image

Sources

Linux: Editing Gnome panels causes system to lock up and freeze before the desktop is visible

I'm not sure what sort of Linux gods I have angered but it seems they have it in for me.

facialflambep1

I was editing a secondary panel and moving the applets around when suddenly the system crashed.

Fair enough, I'll just restart the thing and just try again. However, I wasn't lucky enough to get back into the system...

The desktop froze at a black screen, showing only the faulty secondary panel. No icons, no desktop, no menus, no responses to keyboard, nothing.

So, lucky I had a second computer to look up the fix. Seriously, Linux is not ready for mainstream use if you can't even fiddle with the user interface.

  • Load up your system and get into restore mode via GRUB
  • Select "Drop to root shell prompt"

image

  • Type "rm -rf /home/your_username/.gconf/apps/panel"
  • Exit and restart your system
  • Unfortunately you'll have to set up your panels again
  • Fortunately, you don't have to format and reinstall Linux (starting to sound like Windows)

Alternate solution

I tried this first and it did not work. It involved deleting "/home/your_username/.recently-used.xbel" instead.

Sources

Linux: Installing ipblock/iplist and configuring autostart

*Update 5/1/2014* This post has been superceeded by
"Linux: Installing Peer Guardian 2; an IP blocker like PeerBlock for Windows".

---

iplist/ipblock is a great little tool for Linux which protects you from "bad connections", pretty much what PeerGuardian/PeerBlock does for Windows.

I had a bit of trouble getting it to run properly, and considering how many posts there were about it I figured I'd write a post to help out some people.

Depending on your base version of Linux, add the sources.list in the repository list given here. (It's kept more up to date than this blog post)

Remember to import the signed keys too!

Note: If you're not comfortable with using "vim", feel free to replace any following commands with "gksu gedit" instead.

Once you've done that, put yourself on superuser mode and prepare to get down and dirty with the terminal.

su
apt-get update
apt-get install iplist

Once it's done installing, copy the default setting files over:

cp /usr/share/doc/iplist/examples/ipblock.lists /etc
cp /usr/share/doc/iplist/examples/ipblock.conf /etc

Now to edit the configuration files:

vim /etc/ipblock.conf
  • Change AUTOSTART to "Yes".
  • Remove any lists you don't want from BLOCK_LIST (at minimum keep "level1" and "bogon")
  • Any event information is logged in "/tmp/ipblock.log"
  • Your downloaded list files are stored in "/var/cache/ipblock"

Now edit the list files:

vim /etc/ipblock.lists

Replace the "bluetack.co.uk" entries for the lists you want to keep (in BLOCK_LIST) with the corresponding URL from iblocklists. From my experience, iblocklists.com is updated more often and more reliable than bluetack.

Now to download the lists. You can either use the terminal or the GUI ("Menu" > "Internet" > "IP Block" > click "Update" at the top)

ipblock -u

Then remember to get out of superuser mode.

exit

Restart your computer to check if the AUTOSTART is running properly!

Problems?

TrollFace

If ipblock is preventing your computer from accessing the internet after a reboot (preventing outbound connections, connection into your computer, not pinging correctly, etc) then I'm assuming that you're using wireless/WiFi.

This took a few days for me to figure out but the reason why this is happening is because the wireless takes a moment to connect.

This "moment" is long enough for ipblock to start via the init.d daemon script. It loads up ip_tables, then realises there are no active connections to filter and exits.

This issue will also cause the download of your list files to fail.

ipblock[####]: error: update of level1.gz failed

ipblock[####]: error: update of bogon.gz failed

ipblock[####]: error: update of edu.gz failed

Even though checking the status of ipblock will say it's not running:

sudo ipblock -l
ipblock[####]: error: IPblock is not running

Starting it manually after the WiFi has connected will fix everything, whoever this is not ideal.

To fix this, you'll have to add a short delay before ipblock starts.

sudo vim /etc/init.d/ipblock

Now add in "sleep 30" after "start)":

case "$1" in
start)
    sleep 30
    log_daemon_msg "Starting $DESC" "ipblock"
...

Save, reboot and test.

All is well. Time to embrace your victory ...

funny-hilarious-awesomeness-0
LIKE A BOSS

Sources

django: Create your own documentation for offline use

Assuming that you're running Linux,

  • Download the Django package
  • Extract the "docs" folder
  • In a terminal console, start typing these commands
  • sudo apt-get install python-setuptools
  • sudo easy_install simplejson
  • sudo easy_install Sphinx
  • Finally, get into the docs folder and type "make html" to start compiling it to the HTML format.
  • Your docs will be in built in the folder "_build/html"
  • Now you're ready to fight!
9kiJ7

Linux: Disable the default keyring dialog when automatically logging into wireless network

keyring1

This was more annoying than the Vista UAC popups.

Every time I turned on my laptop, the network manager applet try automatically to access my encrypted wireless network.

Every time it tried it would show this stupid message!

The solution?

Well if you don't mind saving the password for all users on the computer, then this is how to fix it (in Gnome)

  • Right click on the Network Manager icon
  • "Edit Connections"
  • "Wireless"
  • Select the connection you want to work with and click "Edit"
  • Check "Connect Automatically"
  • Check "Available to all users"
  • Log out and log back in

If all went well, it should connect to your wireless network automatically without sexually harassing you.

1300152395676

[ Source ]

LinuxMint: Remove the terminal fortune messages

When I first used LinuxMint, I thought it was a nice touch to have random messages greet you when you open a new terminal window.

It was different, witty or funny. Four to five releases later, they just don't seem as funny anymore.

Screenshot-twig@twigmint^% ~So, how to get rid of them? I couldn't find any specific setting in the Terminal program.

So, off to the forums I went and found this:

sudo vim /etc/bash.bashrc

Go to the end and remove the line that says:

/usr/games/fortune

And then remove it:

sudo apt-get remove fortune

*update 2/6/2011*

Ok, if you were silly like me and followed forum instructions to remove fortune, then DONT! It'll make your login screen black.

To bring it back, do the following:

sudo apt-get install fortune-mod fortunes-husse fortunes-min mint-artwork-common mint-artwork-gnome mintsystem

QXKRz
A minor setback. You go and continue being awesome!

[ Source ]

Linux: Computer temperature docklet

For Windows, I use SpeedFan to display my CPU/graphics card temperature.

Since I use a Gnome based LinuxMint distro, there's a neat little desktop applet called... Computer Temperature Monitor.

All you gotta do is open up a terminal and type:

sudo apt-get install computertemp

Once that's done, right click the tray panel and add a new widget.

Select "Computer Temperature Monitor" and it'll work straight away.

[ website ]

 
Copyright © Twig's Tech Tips
Theme by BloggerThemes & TopWPThemes Sponsored by iBlogtoBlog